Home Assistant: Using Seeed Studio reTerminal e1001 as Home Assistant Dashboard
A few years ago, I embarked on a project to build a dedicated e-ink dashboard for Home Assistant using the LilyGo 4.7” display. It was a fun project, but the screen real estate was always just a little too tight for everything I wanted to display.
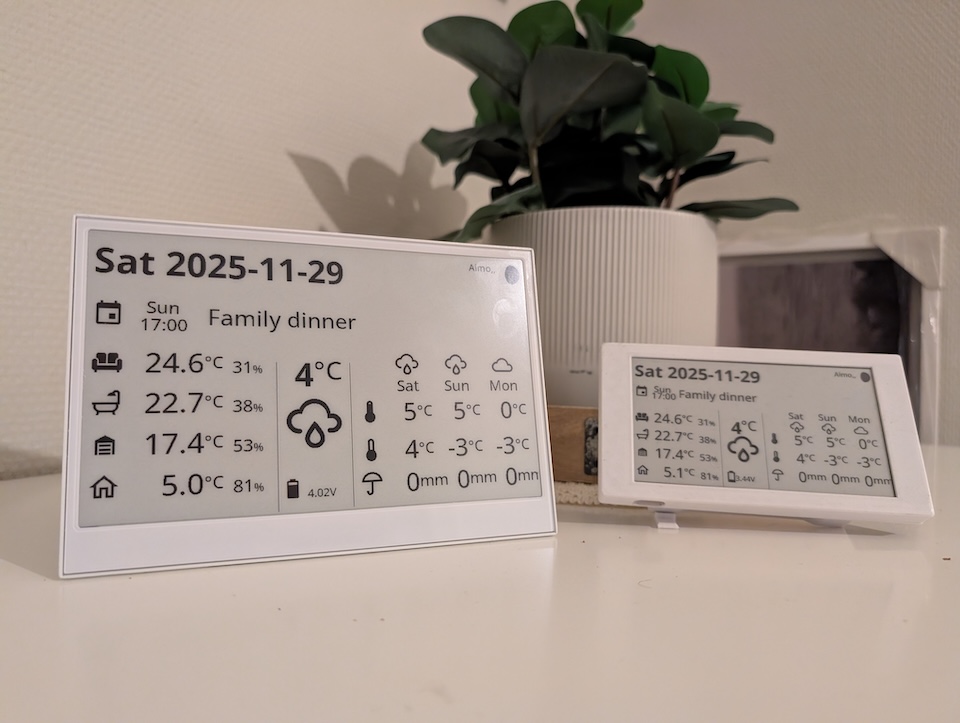
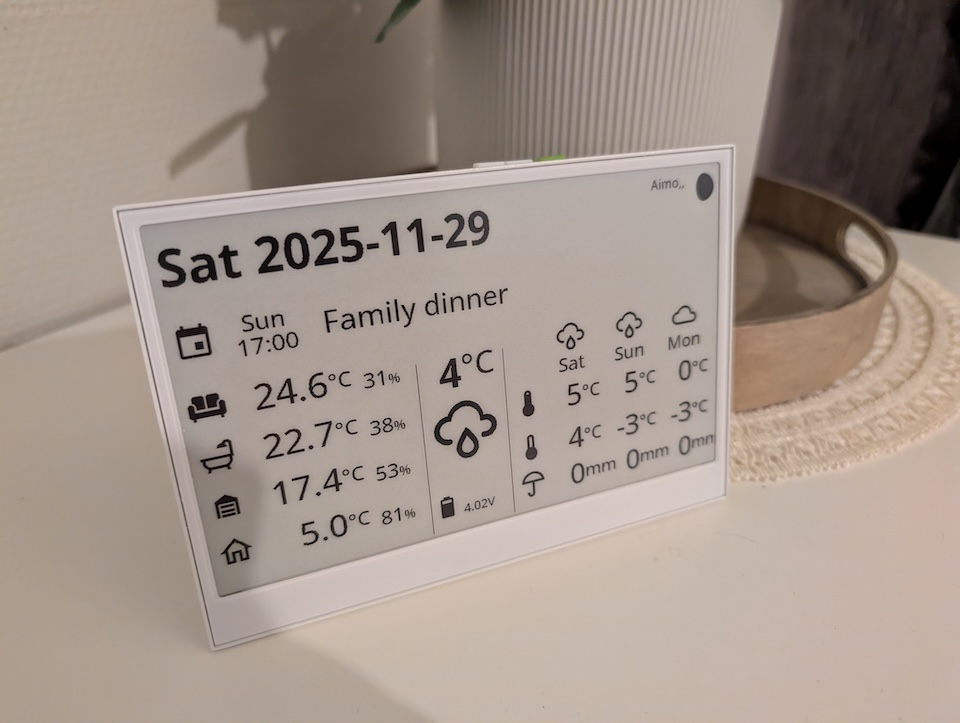
Today, I’m revisiting that concept with a significant upgrade. I’m testing the brand new Seeed Studio reTerminal e1001. I’ll be porting my original dashboard to this spacious 7.5” display to see if it’s the ultimate wire-free solution for smart home control.
Disclaimer: I’ve receive the tested device for free on reviewing purposes, but as always, the opinions are 100% my own and this does not affect the product review.
What is the reTerminal e1001?
Unlike many DIY e-ink components that arrive as bare ribbon cables and fragile glass, the e1001 feels like a finished product. It is powered by the robust ESP32-S3 and offers a complete package for developers and smart home enthusiasts.
Specifications at a Glance
- MCU: ESP32-S3
- Memory: 8MB PSRAM
- StoragE: 32MB Flash + MicroSD Slot
- Display: 7.5″ Monochrome E-ink
- Resolution: 800 x 480
- Battery: 2000mAh
Hardware & Build Quality
The first thing you notice when unboxing the e1001 is that the package contains everything you need to get started immediately, including desk stand support and usb-c cable.
What surprised me the most (positively), is the build quality. The device features a sturdy metal framing, meaning no external housing or 3D printing is required to make it look presentable. It feels premium in the hand and looks great on a shelf. It also offers versatile mounting options straight out of the box:
- Wall Mountable: Perfect for a permanent information hub.
- Table Stand: Included in the box, allowing you to place it on a desk or nightstand.
ESPHome & Battery Life
For Home Assistant users, the software experience is just as important as the hardware. The reTerminal e1001 shines here because it can be flashed with ESPHome straight out of the box – no modifications needed.
Because e-ink displays only consume power when refreshing the image, the battery life potential is massive.
- Efficiency: With a proper update cycle (e.g., deep sleeping between updates), the device can operate for 2 to 3 months on a single charge.
- Wire-Free: This allows you to place the dashboard anywhere in your home without worrying about running power cables.
Porting the Dashboard: From LilyGo to Seeed
I decided to convert my previous Home Assistant dashboard project for this new hardware. While the logic remains similar, there were a few technical hurdles to jump over during the migration.
Just here for the code? Check the GitHub project page.
1. Driver Changes, spi & i2c
First change in the code was the display library. This unit appears to use a Waveshare display driver, which required swapping out the display component in the YAML configuration compared to the LilyGo.
SPI and I2C GPIO needs reconfiguring also.
# define SPI interface
spi:
  clk_pin: GPIO7
  mosi_pin: GPIO9

# define I2C interface
i2c:
  sda: GPIO19
  scl: GPIO20
  scan: false

display:
  # reTerminalE1001
  - platform: waveshare_epaper
    id: epaper_display
    model: 7.50inv2
    cs_pin: GPIO10
    dc_pin: GPIO11
    reset_pin:
      number: GPIO12
      inverted: false
    busy_pin:
      number: GPIO13
      inverted: true
2. Resolution & Coordinates
Here is the trade-off: While the screen is physically larger (7.5″ vs 4.7″), the pixel density is different. The resolution is 800×480.
- This meant I had to recalculate some of the
xandycoordinates for my sensors and text. - You actually have slightly less “pixel density” to work with than some smaller, high-res screens, so bold fonts and high-contrast UI elements work best here.
Otherwise the draw code and syntax is the same. Just pass the elements to draw along with coordinates.
3. Battery Monitoring
The method for reading battery voltage on the e1001 differs from the LilyGo, requiring a code adjustment to ensure the battery percentage reported to Home Assistant is accurate.
output:
  - platform: gpio
    pin: GPIO21
    id: bsp_battery_enable

sensor:
  - platform: adc
    pin: GPIO1
    name: "Battery Voltage"
    id: batt_volt
    update_interval: 60s
    attenuation: 12db
    filters:
      - multiply: 2.0  # Voltage divider compensation
  - platform: template
    name: "e-ink Dashboard Battery"
    id: batt
    unit_of_measurement: "%"
    accuracy_decimals: 0
    device_class: battery
    lambda: |-
      int y = (1-(4.1-id(batt_volt)->state)/(4.1-3.3))*100;
      if (y < 100) {return y;} else {return 100;};
Get the full code
If you want to try this yourself, I have published the full ESPHome configuration and code on GitHub.
Verdict
This is just what we’ve been waiting for. It is an out-of-the-box e-ink display with native ESPHome support. Finally, anyone can create the battery-powered Home Assistant dashboard they need without a 3D printer, soldering or complex wiring.
While the resolution could be better (text can look a little blocky if you look closely), the physical display size is fantastic for readability from a distance. If you are looking for a “set it and forget it” dashboard, the reTerminal e1001 is the way to go.
There’s so many possibilities that you can do with this display. In the future I’m most probably going to make some radical changes on my code to show more calendar events and less temperature/humidity readings. So keep polling the blog for more eink dashboard stuff…
For the Seeed Studio reTerminal e1001 I’d give Smart Home score a full 5 / 5 !