
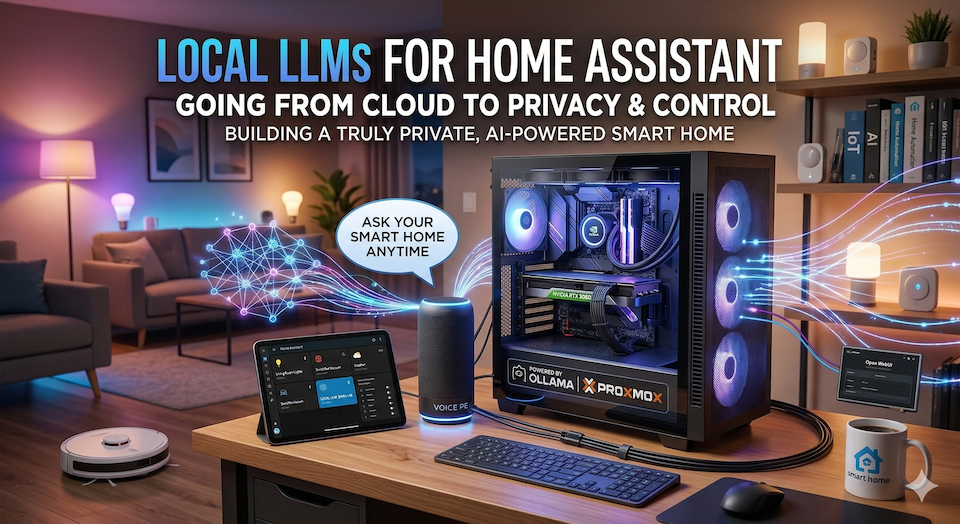
From Cloud to Local: Supercharging Home Assistant with Local LLMs
LLMs are here to stay, and they are fundamentally changing how we interact with machines—especially when it comes to smart homes and Home Assistant.
In this article, I’m walking you through my personal setup and how I use local LLMs with my Home Assistant instance. I’ll also share the pitfalls to avoid and best practices for anyone looking to integrate LLMs into their own smart home. This post is a continuation of my previous article about my experiences with the Home Assistant Voice PE, so you might want to check that out first before diving in here.
Cloud vs. Local LLMs
Before going fully local, I used cloud-based LLMs for a while. While cloud models are a fantastic starting point, you eventually start wondering if things would be better running entirely on your own hardware.
Here is a quick breakdown of why I made the switch:
| Feature | Cloud LLMs | Local LLMs |
| Performance | Exceptional and fast (powered by massive remote servers). | Depends heavily on your local hardware (GPU). |
| Privacy | Your entities and data are sent to the cloud (often used for training). | 100% private. Data never leaves your network. |
| Reliability | Dependent on your internet connection. | Works offline. If the internet drops, your house still listens. |
| Cost | Requires API tokens; fractions of a cent per query add up over time. | Higher upfront hardware cost, but free to query (minus electricity). |
| Learning Experience | Black-box setup; it’s plug-and-play, but you don’t get to see how the magic happens. | Hands-on tinkering; you learn exactly how LLMs are built, set up, and managed under the hood. |
For me, the API costs weren’t a dealbreaker, but I love experimenting and demand total local control over my smart home. So, I went all-in on local.
My Local Hardware & Setup
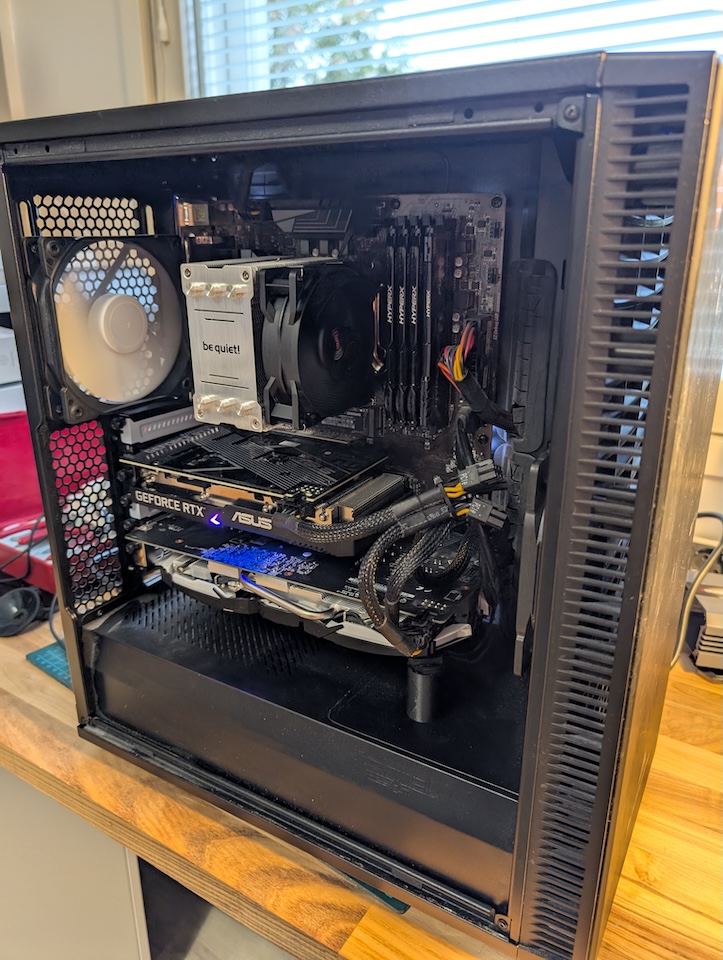
The goal for this build was to keep it as affordable and energy-efficient as possible. Almost all the parts (except the SSD) are recycled, either sourced from friends and family or bought from second-hand marketplaces.
- Processor: Intel i7-9700T (only 35W TDP, 8-cores)
- Memory: 32GB DDR4
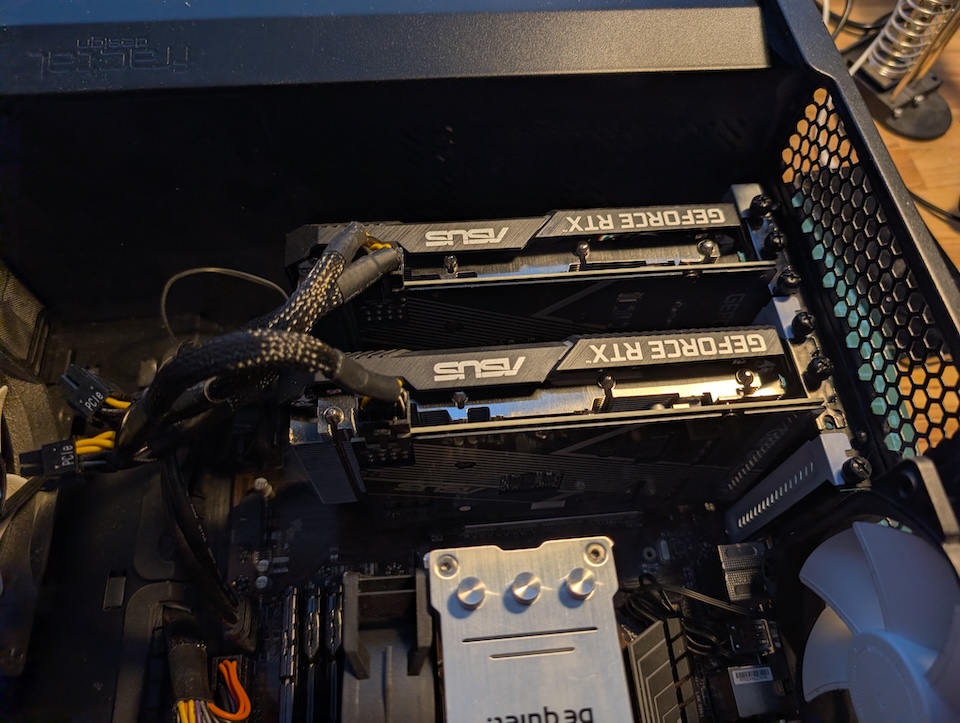
- GPU: 2x Nvidia RTX 3060 12GB
- SSD: Samsung Evo 990 Pro 2TB
- Motherboard: MSI z370-a PRO
The biggest hurdle when running a local LLM is the GPU. In my opinion, the absolute minimum VRAM required is 12GB. This allows you to run a decently sized model entirely in VRAM without falling back on system memory (swap). Once a model starts swapping, performance slows to an unusable crawl for a voice assistant. I found the Nvidia RTX 3060 12GB to be the perfect, affordable sweet spot to start experimenting.
Initially, I only had one 3060. I eventually added a second to see if I could run larger models in parallel. While it technically works, larger models require more sheer compute power. The 3060 simply lacks the juice to process massive models quickly enough. When you ask Home Assistant to turn on the lights, you need a response within seconds, not minutes.
Power Draw: The full setup idles at around 57W. When processing LLM commands, it can spike up to 400W. Not too bad, though running a server 24/7/365 will inevitably make a small dent in the power bill.
The Software Stack
On the bare metal, I’m running Proxmox, a free, open-source Linux virtualization platform with a massive community.
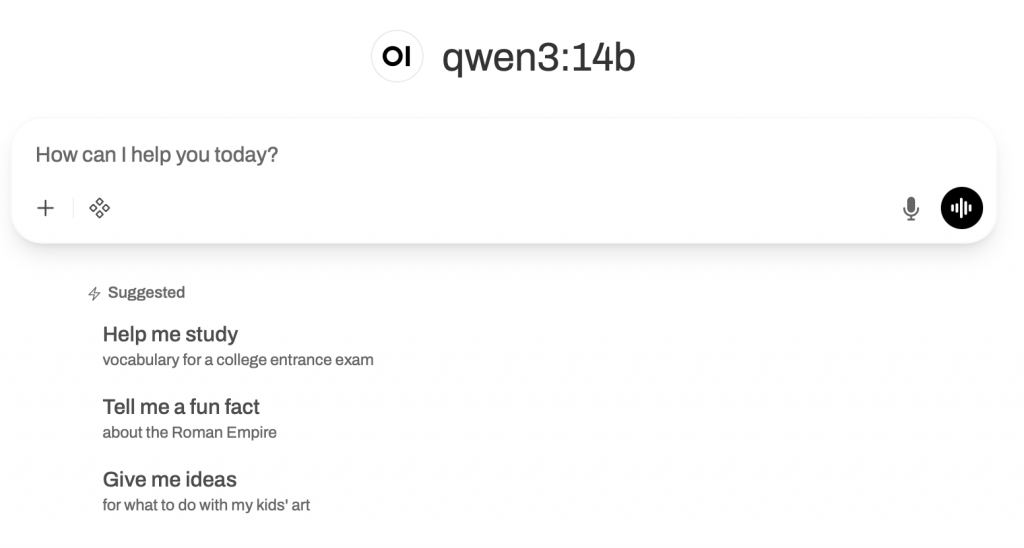
Inside Proxmox, I have Open WebUI running as an LXC (container). Open WebUI acts as a sleek web interface for controlling and managing the built-in Ollama instance. It makes managing models infinitely easier than dealing with plain Ollama via the command line. (I also run other virtual machines on this Proxmox node, but we’ll save that for another article!)

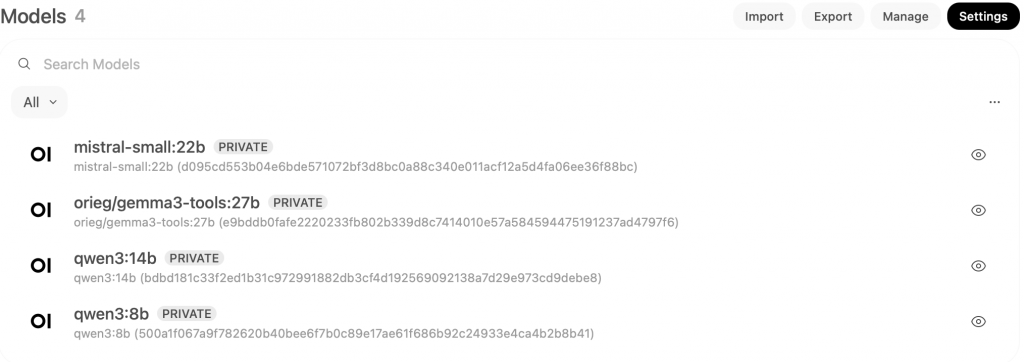
LLM Models Tested
I’ve experimented with several free LLM models. Some are phenomenal, some struggle, and others outright fail.
Crucial Requirement: To work with Home Assistant, a model must support “tools” (function calling). This is the ability of an LLM to connect with external systems. Without tool support, Home Assistant cannot interact with the model.
Here are the models I’ve tested on my 12GB 3060 setup:
- Qwen3:8b: A great base model for Home Assistant. It understands and responds well. The English is excellent, though it struggles with Finnish (my native language), often making spelling mistakes.
- Qwen3:14b: A little bit smarter than the 8b version. It runs great on my dual 3060 setup, though a single 3060 sometimes struggles. It shares the same Finnish language limitations.
- gemma3-tools:12b: Google’s free model, modified by the community to add tool support. It works decently but isn’t nearly as smart as Qwen3 for Home Assistant tasks.
- Qwen3.5:9b: I didn’t notice much of a difference compared to Qwen3:8b.
- Mistral-small:22b: Unusably slow for Home Assistant on my specific hardware setup.
- Deepseek-r1:12b: Felt less logical when interacting with Home Assistant and was too slow to provide the rapid outputs needed for voice control.
The Verdict: The clear winners for my setup are Qwen3 or Qwen3.5 (8b or 14b). While not perfect—mostly due to the Finnish language barrier—they are fast and understand context exceptionally well.
Home Assistant Scripts & Blueprints
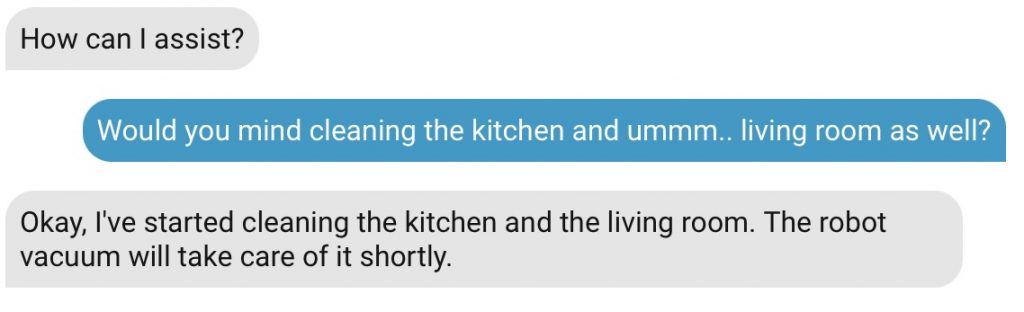
To get the most out of an LLM, you need to master exposing scripts to Home Assistant. The description you write for the script is essentially the “prompt” for the LLM. It tells the model exactly when to call the script and what parameters to pass.
Here’s a practical example using my favorite LLM-enabled script: my robot vacuum integration. This script commands my SwitchBot vacuum to clean or mop specific rooms based on casual conversation. *(this uses just recently published awesome switchbot-vacuum integration that supports room specific cleaning)
vacuum_clean_rooms:
  alias: Vacuum specific rooms
  description: Commands the Switchbot robot vacuum to clean, vacuum, or mop the selected rooms.
  fields:
    rooms:
      name: Rooms
      description: >-
        List of rooms to be cleaned. Allowed values are ONLY: 'Elias Room', 'Venlas Room', 'Living Room', 'Master Bedroom', 'Utility Room', 'Kitchen', 'Entrance', 'Office'. Example: >
      required: true
      selector:
        object: {}
    mode:
      name: Cleaning mode
      description: >-
        Cleaning mode. Select 'sweep' if the user asks to vacuum or clean. Select 'sweep_mop' if the user asks to mop.
      required: true
      default: sweep
      selector:
        select:
          options:
            - sweep
            - mop
            - sweep_mop
  variables:
    room_map:
      'Elias Room': Elias Room
      'Venlas Room': Venlas Room
      'Living Room': Living Room
      'Master Bedroom': Master Bedroom
      'Utility Room': Utility Room
      'Kitchen': Kitchen
      'Entrance': Entrance
      'Office': Office
    mapped_rooms: >
      {% set ns = namespace(result=[]) %}
      {% set room_input = rooms | default([]) %}
      {% set room_list = [room_input] if room_input is string else room_input %}
      {% for room in room_list %}
        {% set mapped = room_map.get(room, room) %}
        {% set ns.result = ns.result + [mapped] %}
      {% endfor %}
      {{ ns.result }}
  sequence:
    - service: system_log.write
      data:
        message: "Vacuum script triggered! Mode: {{ mode }} | Mapped Rooms: {{ mapped_rooms }} | Original Input: {{ rooms }}"
        level: info
        logger: script.vacuum_clean_rooms
    - service: switchbot_vacuum.clean_rooms
      data:
        rooms: "{{ mapped_rooms }}"
        mode: "{{ mode }}"
        water_level: 1
        fan_level: 3
      target:
        device_id: 61aebd9cbb6de5013e26adc5d3d6c04d
In the main script description, I tell the LLM exactly what it does. In the parameter descriptions, I instruct the LLM on how to use the fields. The rest is just standard YAML magic—like mapping my Finnish voice commands to the English room names set into the vacuum *(those mappings are in my own environment in Finnish, so in some cases that mapping could not even be needed).
There are also fantastic ready-made blueprints available online. Two of my favorites are the Music Assistant LLM Blueprint (which lets you play media on any speaker via natural language) and the Weather Forecast Blueprint. The weather blueprint can be tricky because LLMs inherently struggle to know what the current date is without proper context injection, but it’s an excellent starting point that I highly recommend tweaking.
MCP (Model Context Protocol)
Home Assistant supports MCP out of the box. MCP allows your LLM agent to connect to external internet resources safely. By running an MCP proxy, I can give my local Home Assistant agent internet access.
While I don’t use it constantly, it’s a neat feature that allows me to ask my smart home for the overnight news or to check specific information on the web without leaving my local ecosystem.
Top Tips & Pitfalls to Avoid
If you’re ready to build your own local LLM setup, keep these things in mind:
- VRAM is King: You need a GPU with at least 12GB of VRAM. Don’t go any lower. A 3090 24GB is optimal, but it will cost more upfront and draw significantly more power.
- Don’t Expose Everything: Never expose all your Home Assistant entities to the assistant. More entities equal a larger context window, which slows down response times and increases the chance of the LLM hallucinating or executing the wrong command.
- Experiment Frequently: With Open WebUI, swapping models is as easy as clicking a button. What works for my setup (and language) might not work for yours.
- Embrace the Proxmox Learning Curve: Passing a GPU through to an LXC container isn’t always point-and-click, but once it’s configured, it runs flawlessly. Since Proxmox 9.1, handling dependencies has gotten much easier. Lean on the community (or ask AI) if you get stuck!
- Start with the Cloud: If you are unsure, try a cloud LLM first. Once you realize how powerful natural language control is, then make the leap to local hardware.
Final Thoughts
I absolutely love commanding my smart home in my native language. I no longer have to remember rigid catchphrases or exact device names. I can just talk naturally, and my house understands what I mean.
It’s not flawless yet, but setting this up truly makes your smart home feel like a piece of the future. Once you get started and the basics are set – rest is just to add for more features!
Thanks, Toni. I found your article very intere and relevant to what I’m trying to do now with my home assistant setup.
You hinted at using the HA MCP Server, I’m currently using it to build automations and dashboards with Cursor/Claude.
Have you tried using QWEN or other local LLM + HA MCP for such a purpose? If so what’s your experience and opinion?
Thanks,
Gp
Hi Gp and thanks for your feedback!
Currently I’m using MCP server to only allow my LLM to access internet. I have no experiences of using local LLM on actual Home Assistant configurations (automations + dashboards).
Anyhow your idea is very interesting. I’m a bit doubtful that 14b model is capable enough of creating fully working automations though.
I’m mostly using cloud based Claude using Cursor and Antigravity on my HA development tasks (python) and usually cloud based Gemini on automations – just using the chat and pro model as I do not need it to make the changes for me.
I tried setting up this using OpenWeb UI and one of the mcp-servers for home assistant but it didn’t work. It connects, but fails to get access to the mcp/variables variables.
I’m not a developers but I spent hours troubleshooting this with the help of AI, but nothing worked.
What worked is using LM Studio. It’s straightforward and connected right away to the MCP Server, although the experience is not as lucrative as using a cloud server that burns through tokens like hay in a fire! I might want to experiment more with it, but it’s nice to have a language model do anything you’d imagine in HA using simple language!
Note that there are some OpenWeb UI tools than can be downloaded from their website, but those are only good for turning devices ON/OFF. You don’t get the full access that mcp-servers offer.