
Review: HeatIt Z-Smoke Multisensor AC
For a while I’ve been looking for a AC (230v) connected Z-Wave smoke detector, but to be honest, there are not that many vendors manufacturing these, I wonder why? But luckily last week I had a privilege to review the brand new HeatIt Z-Smoke Multisensor AC Black within my own smart home environment (thanks HeatIt for sending me a sample)! Even though the device reviewed is provided by free, all opinions of the Smoke detector are completely honest.
The device is available as black or white directly from HeatIt or from kotiautomaatiokauppa.fi, which is one of the official retailers of HeatIt products in Finland.
Packed with features
First of all I would not like to call this device as a Smoke Detector, but a multi sensor instead (editors note: it’s actually named as multisensor). That’s because the device is packed with tons of features.
The multi sensor is a Z-Wave device supporting all the essential Z-Wave functionalities. That (of course) means, that if you want to take every inch use of it, an existing Z-Wave gateway is a mandatory. You ‘can’ use the device without gateway as well, but then it’s just a plain old smoke detector without all those fancy features.
Supported Z-Wave features:
- Associations (linking with other devices)
- S0, S2 security authentication protocols
- OTA Firmware updates
And then the interesting part, features that are within the device itself:
- Smoke + Heat detectors
- Motion Sensor
- Temperature Sensor
- Warning light
- Tamper protection
Other features:
- Battery backed-up
- Silence button
So, full pack of features.. the most interesting part of it is the motion detector! Some of the best places for motion detectors are usually on the ceiling and normally you don’t have wiring set up for external motion detector at that place, so why not combine with the smoke detector? Very clever out-of-the-box thinking there HeatIt!
Hardware installation
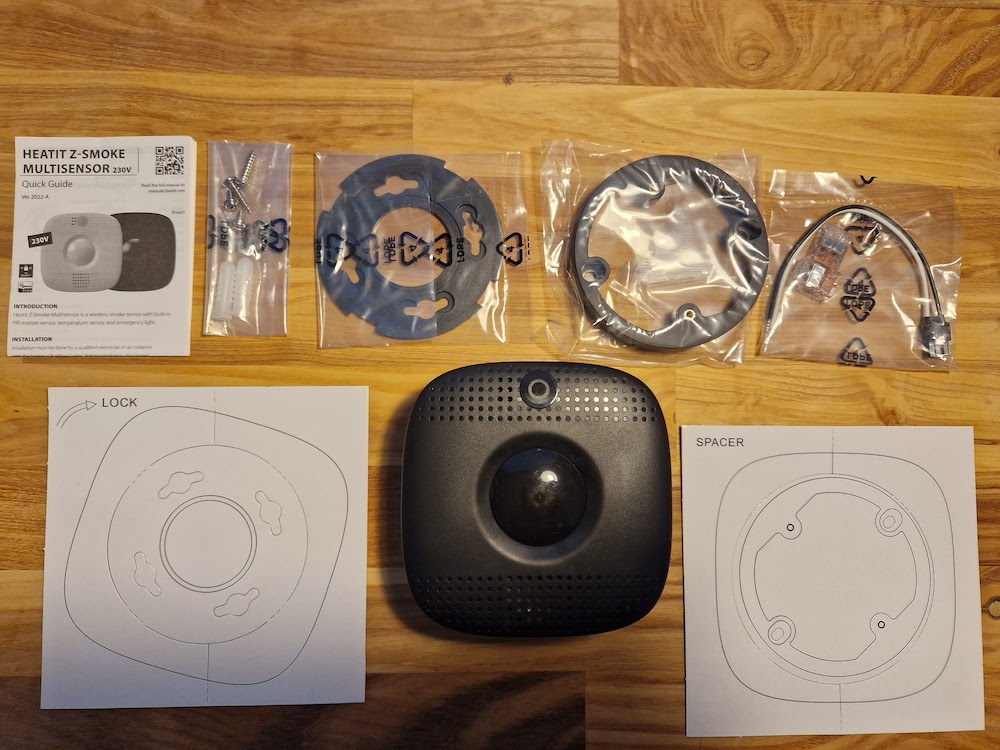
The package contains everything needed for installation: the multi sensor itself, mounting bracket, wires and connectors, two sets of screws for different types walls (drywall/wood or concrete), spacer in case tight installation space and couple of cardboard templates for a perfect fit.
The hardware installation itself is extremely simple: disconnect the mains*, install optional spacer if needed using the template, install mounting bracket with template, connect wires*, turn on the device and mount it in. (* = required to be done by electrician).
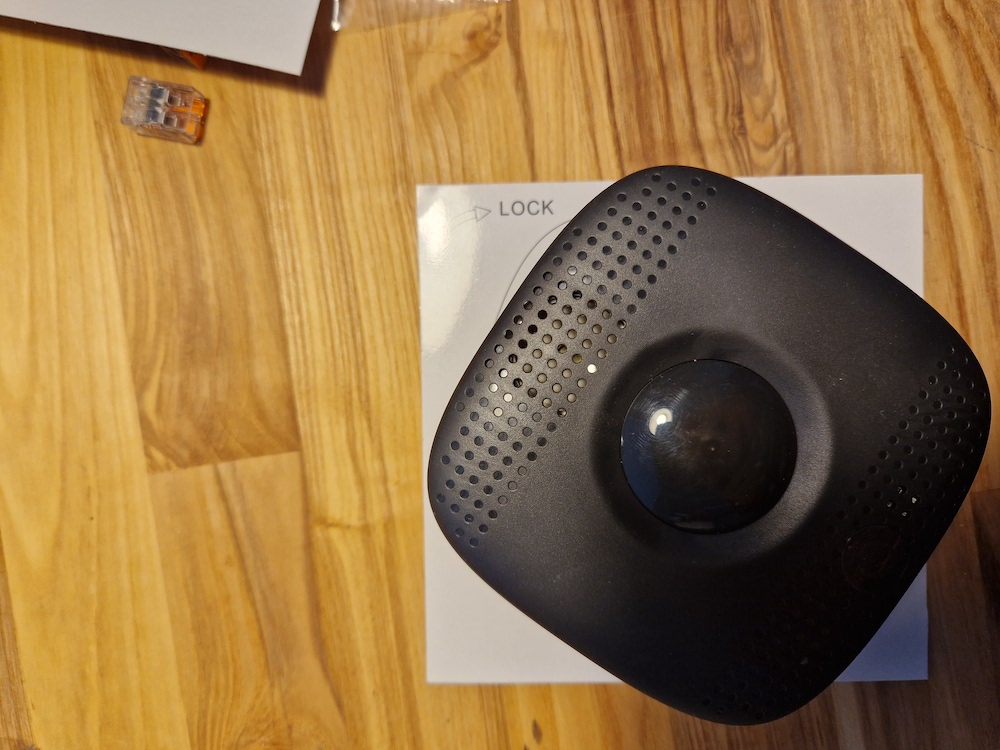
However, in order to make the device straight on the ceiling the template is not a way to go. The device model is printed to the template in a bit angled so it is actually quite difficult to match it on the ceiling, especially if having a solid plain ceiling. A better way to do it is actually to use scissors to cut the device model out of the template and use that to mark the places for the screw. Anyhow, that’s a minor issue, otherwise the installation is a simple as it should be.
Z-Wave pairing
Since it’s a SMART appliance on the table, it’s important to review the software configuration procedure as well. On this review, the environment used is Home Assistant along with ZWaveJS UI and Aeotec Z-Stick Gen 5+.
The quick start guide says following: “Add/Remove: After power is applied, the smoke detector initiates a 1-minute warm-up period. During this minute, the device will automatically enter add/remove mode, and may now be added to the system via the primary controller/gateway.”
However, the actual inclusion mode is started by ‘de-facto standard’ by pressing three times quickly the main button in the front plate. Trying to pair by using the on/off button as instructed by the manual took me some time and little amount of confusion. This was of course mentioned in the full manual downloadable from HeatIt website, but not in the quick start guide.
But after figuring that out, the software pairing was as same as with any other device, easy: set inclusion from device, set inclusion from the gateway and boom, connected!
Deeper look into the features
Next a deeper dive into separate sensors packed in one:
Clearly the most essential part of the multi sensor is the optical smoke detector, a security device that should work in EVERY occasion. So it’s an excellent thing that HeatIt has decided to add a battery backup in it in case of electric failure. When testing smoke detector with an artificial smoke spray the device instantly responded with a very loud alarm alarm. Very good!
Second there’s a motion detector included within the device. The device specifications describes that the motion detectors range is up to 8 meters at 3 meters distance. True, but to make most use of the motion detector the device placement needs to be considered. The best place to install the device would be in the center of a room or on a (narrow) corridor. In the test environment I have a 1:3 slanted ceiling and the device itself is not in the center of the roof, worst place to put a motion sensor into. When designing a new house it’s easy to find great spaces for these sensors, but when retrofitting, things do get a little more complicated: it’s just not that easy to wire up a new spot for a sensor. Anyhow, to tackle these issues HeatIt also has battery powered multisensor available in their product range.
Third feature is the temperature sensor. In the ceiling the temperature is (almost) every time one or two degrees of celsius warmer than on human height, you know, warm air always rises up. The temperature sensor itself is extremely accurate and the values did match very well when comparing results with Aqara Temperature Sensor and an old fashioned analog quick silver based sensor. So again, very depending on the installation position. The higher the ceiling, more disaccurate it will be to use with automations.
Fourth is the siren functionality. The device has one siren sound and is activated when smoke is detected. Siren is marked as 85dB at 3 meter distance that is loud enough to hear through out the house.
Smart features, hit or miss?
The device is clearly targeted for a smart home owners/builders so the smart features are under a close look. As stated previously the device uses a Z-Wave network to communicate with the Z-Wave coordinator/hub and other Z-Wave devices.
The best and most important one of the smart features is the device linking using Z-Wave associations. The device can act as an emitter and/or receiver. Meaning that when ever there is smoke detected within ANY supported smoke detectors, one or all detectors will start the alarm and clearly it won’t get unnoticed by any residents in the house. Z-Wave links do work even when the coordinator is down. And since the device is also battery backed up, it will alarm even on power cut (imagine a situation when the fire is started from the electricity). Z-Wave associations/device linkings are needed to be configured through the Z-Wave hub.
Other Z-Wave entities exposed to the Z-Wave coordinator are: Air temperature, Alarm Silenced, Motion Detection, Overheat detected, Smoke Detected, AC Connection, Backup battery level, Low battery level and tampering indication. With those other entities it’s easy to see (through smart home hub) that the device is 100% functional. Of course this does not remove the need to test the smoke detector manually every now and then to ensure it’s doing it’s primary job correctly.
Since the Smoke Detected entity is carried all the way back to the Z-Wave hub, the smart home can be automated (of course depends of the hub) to send notifications when alarm is triggered. Big important thing once again!
It’s all good and new, right? Not necessarily, I did spot few issues I would like to see in the future of (hopefully through OTA updates).
Why is the siren not exposed as entity through Z-Wave, so you could actually use the device as central alarm system? Currently it’s not ‘possible’ to use the device as a burglar alarm*. (*you can actually use it by sending specific command to the device, but not all gateways support it)
Another issue is that you can’t actually change the sensitivity or timeout of the motion detector. It seems that the motion detector sends motion cleared even after one minute delay. This should be configurable since the need for this changes depending on the installation location and usage heavily.
Verdict:
Pros:
- Packed with features
- Motion sensor
- Z-Wave associations/device linking (working along with other brands as well)
Cons:
- Hefty price (140€)
- Motion sensor usefulness depends heavily on installation location
- Why ‘limited’ set of Z-Wave features?
Smart Home Score: 4/5
It’s clear that the device is excellent and makes it very useful in any Z-Wave environment. Battery backup and device linking are the key selling points. In addition it offers a fully working motion sensor, but the usefulness of it requires a bit of a planning beforehand.
Is it worth of the high 140€ price then? In theory you get four devices in one (temperature, motion, smoke, siren). Buying all those four Z-Wave devices separately the price tag would be even higher. However, like in every all-in-one devices, there are some compromises to be made and agreed with.
Hi,
Interesting analyse, thanks! You said by special command this device can be used as a siren. What that would be? I assume Home Assistant with ZWave JS could do that.
Br,
Kai
Hi and thanks for the feedback!
The user manual describes the used Z-Wave command to start the siren.
At least on ZWave JS you can send these specified messages to Z-Wave targets.
Hi,
Did you get this working? I can do this with battery operated, but not with AC connected version.
In battery version there is command_class: “32”, but that does not exist in my ac version. Which command_class you used?
Tried out this quickly as well, but didn’t manage to get it work, maybe an issue with current firmware?
I will look out this more deeply at the coming weekend.. maybe there is really is a bug and needs to be reported to HeatIt so they can fix it.
I’ll get back to this as soon as I manage to do some more research as well. If it won’t work at all I need to add a disclaimer to the actual blog text about this 🙂
I have few of these at home & cabin; the only thing among using siren for other uses originally meant is amount it uses battery. Now you had AC version, maybe thats smart after all. Anywho – been satisfied with the gadget and used it for a lot of things – enabling kitchen backlit etc. via PIR – works as intented.