
Guide: Samsung A/C to Home Assistant
For few days I’ve been looking a way to integrate my summer home Samsung A/C unit into Home Assistant. After numerous amounts of failures I finally found a ‘proper’ way to do it. So here are the instructions how I did it.
This guide is targeted for Samsung AC devices that uses port 8888. So if your AC device uses e.g. 2878 this guide might not work for you.
Also you should be running Home Assistant supervised for the Add-ons to be available. If not, you might have to use some another ways to access into HA core.
Most of the details info was found from Home Assistant climate_ip community project thread
Finding the corresponding port and ip
First of all the AC device need to have a static IP, so if your router is assigning an IP through DHCP make sure it leases a static IP for the AC device. More information how to set the static IP should be found from your router manual and internet. Make sure to save your AC device IP address to somewhere. You will need it later many times.
Next thing to do is to find the port of your machine. In linux or windows environment you could try e.g. ‘telnet 192.168.1.xxx 8888’ (make sure you enter correct ip). If you get a reply like “Escape character is ‘^]’.” you’ve found the correct port that in this case is 8888.
Getting the token
The most difficult part was to fetch out the access token from the AC machine. So here’s step-by-step guide how I eventually managed to get it:
1. SSH & Web Terminal
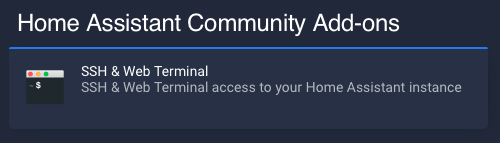
Install ‘SSH & Web Terminal‘ from Supervisor -> Home Assistant Add-on Store. Note that this ‘SSH & Web Terminal’ is NOT the standard SSH server, but enhanced version of it that grants you access to the HA core system.
Configure SSH & Web Terminal add-on to run e.g. in port 2222 and setup your username & password through it. After fully configured it, start the add-on. I personally disable this add-on every time I don’t need it for security reasons. I don’t want run extra services if they are not required in daily basis.
Now SSH into your new SSH server (port 2222) that you’ve just installed.
2. Get the token fetch software
Download the token software from this google drive folder. I went through the code before running it just to make sure it was safe and did not contain anything suspicious. So at least at the time of writing this post it is safe to use.
Copy these three files to your Home Assistant machines you just SSH’d into. You can use something like scp (secure copy) or any other file transfer protocols of your choice.
3. Configure the token fetch software
Next is to setup your AC IP address into the fetch software. So edit actest.py and insert your IP instead of SAMSUNG.IP field in line number 4.
4. Turn off your AC
This one is VERY important step. Turn off your AC before proceeding forward. This is because access token is sent to the server software AFTER starting the AC unit. (Don’t power it off permanently, just switch off from the remote).
5. Start the software
First we need to start server software that will receive the token when AC is being started. Run ‘python3 server.py‘ in your SSH client.
Next thing to do is “tell” Samsung AC to connect your server after on boot. Make another connection to your HA SSH port 2222 from another terminal window. Enter the directory you copied the files and run ‘python3 actest.py‘.
6. Get the token
Now after all this is done, only one step is remaining.
Switch back to the first terminal that is running your server.py and start your AC unit. After few seconds you should see something like this:
----- Request Start ----->

Request path: /devicetoken/response
Content Length: 0
Request headers: Host: 192.168.1.100:8889
Accept: */*

X-API-Version : v1.0.0
Content-Type: application/json
Content-Length: 28


Request payload: b'{"DeviceToken":"abCD12ABv5"}'
Body: <__main__.RequestHandler object at 0x7f4e034ec490>
<----- Request End -----
And as you can notice, the Request payload in the log contains your token. Copy the token somewhere for later use.
You can now stop the server by pressing ctrl+c in terminal window and exit SSH clients. Also you can now shutdown your ‘SSH & Web Terminal’ add-on. And if you wish, you can also delete it, if you don’t need it in any other purposes.
Installing custom component
The Home Assistant component you need is called climate_ip. You can either download it directly to custom_components folder in Home Assistant or use HACS.
I’d recommend using HACS so you can get latest updates automatically without polling the repositories yourself. If using HACS try to find ‘samsungrac’ component from HACS interface and install it.
Configuration
At the moment of writing this post only way to configure the climate_ip component is the configuration.yaml file in Home Assistant configuration folder. Hopefully it will be migrated to config flow sooner or later.
Edit configuration.yaml file and add following information below climate -section:
climate:
  - platform: climate_ip
    config_file: 'samsungrac.yaml'
    ip_address: 'YOUR_SAMSUNG_IP'
    token: 'TOKEN'
    cert: 'ac14k_m.pem'
    name: "Samsung Heat Pump"
Make sure to set your ip_address, token and name. Others you most probably don’t need to change if having AC with port 8888.
Last thing is to restart your Home Assistant and add thermostat card in Lovelace UI.
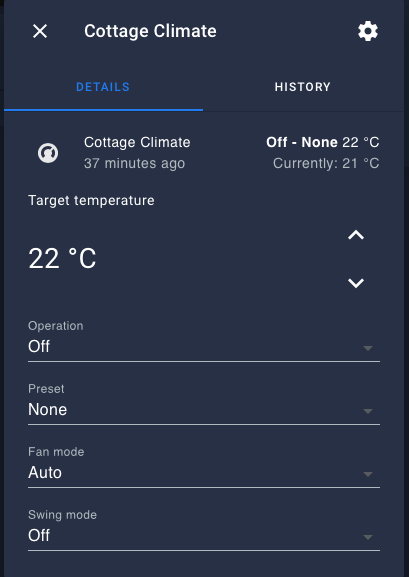
Samsung Heat Pump details 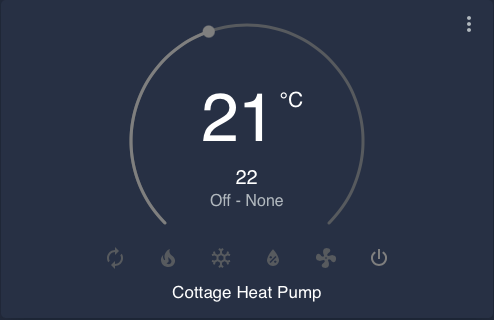
Samsung Heat Pump Thermostat Lovelace Card
Conclusion
Hopefully this guide will help other people a bit so they don’t have to use as many hours to fight to get the token. I’ve tried numerous of different software and also tried to install few virtual machines to have older SSL that the Samsung AC is still using without any luck.
Hi Toni ,
when I execute the command ‘ python3 actest.py ‘ on the second terminal window I get an error :
/usr/lib/python3/dist-packages/urllib3/connectionpool.py:845: InsecureRequestWarning: Unverified HTTPS request is being made. Adding certificate verification is strongly advised. See: https://urllib3.readthedocs.io/en/latest/advanced-usage.html#ssl-warnings
InsecureRequestWarning)
What could be the problem ?
Many thanks
Gianluca
Hi!
That’s ‘only’ a warning that can be ignored, does not affect the outcome. 🙂
For more specific:
Warning tells you that the requests made are not secure enough.
In normal case you should not continue forward, but since we’re only using insecure certificates in our local network and not through internet it can be ignored.
Does it works with WindFree Elite AR12TXCAAWKN? Because I have no luck :/
Unfortunately I have no idea.
It might work if it responds to port 8888. Does it?
no 🙁 telnet doesn’t work on port 8888 nor 2878
nmap found only 29584/tcp opened
That’s too bad 🙁
This guide then definately won’t work with your AC.
Sorry I can’t help you more, you could try to search from Home Assistant forums for example.
Hope you will find a solution eventually!
thanks, I think use of SmartThings API is solution but HASS can’t get all data
nvm thanks for your quick reaction 🙂
Thank you for your how to, it worked like charm.
This is my aditional steps:
Client part supress warning:
export PYTHONWARNINGS=”ignore:Unverified HTTPS request”
In CentOS 8 by default use TLS1.2, so openssl can use TLS1.0 after command.
export OPENSSL_CONF=~openssl_allow_tls1.0.cnf
Hi,
It’s good to hear this blog post did help someone 🙂
…and thanks for your input for ignoring unnecessary warnings!
Hi,
thanks a lot for your guide but i have some problems to find my AC token and i don’t know where i fail.
i follow every steps but server.py only listening and actest.py send me a security advise and then close.
can u hel me?
thanks and sorry for bad english 🙁
First thing that comes in my mind is that your A/C is not working with this approach.
Few questions related it:
– What model is it and how old is it? (manufacture year)
– Does it respond to port 8888 ?
Hello, do you know if this works on this model works with home assistant?
AR09HSSFAWKN?
It’s working on phone but not with smart things, it’s working with an old application named Smart Air Conditioning.
Thanks!
Sorry, no idea if that specific is supported by this method.
You can try to check if it responds to port 8888. If it does, it most probably works with this.
hi thank you for this post
My Samsung Includes an Eco heating system which I can see at HA, but can not control for now, do you have any Knowledge about it?
Sorry, no experience about that specific eco heating mode.
The Home Assistant ClimateIP custom_component used most probably does not support that mode so it would need ‘some’ code changes to get it supported.
You could try to create a GitHub issue to the code maintainer: https://github.com/SebuZet/samsungrac
what version of python had u using? by 3.9 its show some errors
Could u help?
$ python3 server.py
Listening on localhost:8889
Traceback (most recent call last):
File “/home/sonics007/server.py”, line 48, in
main()
File “/home/sonics007/server.py”, line 44, in main
server.socket = ssl.wrap_socket(server.socket, certfile=’cert.pem’, server_s ide=True)
File “/usr/lib/python3.9/ssl.py”, line 1402, in wrap_socket
context.load_cert_chain(certfile, keyfile)
ssl.SSLError: [SSL: CA_MD_TOO_WEAK] ca md too weak (_ssl.c:4022)
Hi!
It’s been a while when I made this through and sorry to tell you, but I really can’t remember which version of Python I was running back then.
Have you installed the custom SSH service through Home Assistant Add-on store? This method does not work with the default SSH server (requires access to the root system).
Listening on localhost:8889
/root/server.py:44: DeprecationWarning: ssl.wrap_socket() is deprecated, use SSLContext.wrap_socket()
server.socket = ssl.wrap_socket(server.socket, certfile=’cert.pem’, server_side=True)
Traceback (most recent call last):
File “/root/server.py”, line 48, in
main()
File “/root/server.py”, line 44, in main
server.socket = ssl.wrap_socket(server.socket, certfile=’cert.pem’, server_side=True)
^^^^^^^^^^^^^^^^^^^^^^^^^^^^^^^^^^^^^^^^^^^^^^^^^^^^^^^^^^^^^^^^^^^^^
File “/usr/lib/python3.11/ssl.py”, line 1443, in wrap_socket
context.load_cert_chain(certfile, keyfile)
ssl.SSLError: [SSL: CA_MD_TOO_WEAK] ca md too weak (_ssl.c:3900)
I get this error
can anyone help?
Same here. Tried three different Linux installation, all give the same SSL: CA_MD_TOO_WEAK error.
Thank you for the tutorial
I tried getting the token for my Samsung Windfree 2019 AC, but when I try to run the telnet command to check the port, I get a ‘connection refused’ message.
I also get an error message when I ran the actest.py command:
SamsungAC % python3 actest.py
Traceback (most recent call last):
File “/Users/mjeshurun/Desktop/SamsungAC/actest.py”, line 1, in
import requests
ModuleNotFoundError: No module named ‘requests’
mjeshurun@Miki-MacBook-Pro SamsungAC % python3 actest.py
Traceback (most recent call last):
File “/Users/mjeshurun/Desktop/SamsungAC/actest.py”, line 1, in
import requests
ModuleNotFoundError: No module named ‘requests’
Am I doing something wrong?
Hi!
Most probably your Samsung AC can not be connected by using this method, since you’re getting the connection refused error (the port is not open from the AC device).
Hello, for Samsung AC AR09TXEAAWKN, looking for on which port is communicates on (for Wifi network and REST API setup).
Not found such information on web pages…