
Guide: Local MQTT broker with Meross and Home Assistant
Meross is great even through the cloud and with local http api, but there’s a one problem with that. Local connection for Meross uses HTTP APIs and Home Assistant polls the devices every 30 seconds and when I do open my garage door, the status will not change instantly, but between 0-59seconds depending on the last poll time.
So, this time I decided to configure my garage door opener with full local MQTT connection. It will disconnect me total from the Meross cloud, but I’m ok with that. However, I’m doing this for only my garage door opener and keeping the summer home water pump still connected to the cloud, just in case.
This method only works with Meross pre-HomeKit devices.
To go through this guide you will need a Unix based PC with WiFi and basic konwledge of it.
Also please not the that this will disconnect the device totally form the Meross cloud and official Meross app can’t be used with that device anymore.
Enabling SSL certificates
Meross uses encrypted MQTT connection so first thing to do is generate SSL certificates and configure MQTT broker to use encrypted SSL connection.
SSL can be enabled in parallel with non-secure connections, so you don’t have to configure all of your other devices to use the SSL connection. However, I suggest to switch to SSL other devices as well if possible!
In this guide I’m using openssl with separate Linux machine to generate the certificates. There’s also Windows applications to generate the certificates (more details e.g. in this article).
So generating the self-signed SSL certificates can be done with the commands below. The script will generate all required files in a folder named ‘certs’.
mkdir -p certs/{ca,broker}
cd certs

# ca
openssl genrsa   -out ca/ca.key   2048
openssl req   -new   -x509   -days 1826   -key ca/ca.key   -out ca/ca.crt   -subj "/CN=MQTT CA"

# broker
openssl genrsa   -out broker/broker.key   2048
openssl req   -new   -out broker/broker.csr   -key broker/broker.key   -subj "/CN=broker"
openssl x509   -req   -in broker/broker.csr   -CA ca/ca.crt   -CAkey ca/ca.key   -CAcreateserial   -out broker/broker.crt   -days 360
Now that the certificates are generated we need to copy them to Home Assistant SSL folder. Before copying, make sure you don’t override anything you have previously in that folder. You might have some other certs in there and in that case, ensure that at least the ca.key does not exist already in the folder. If existing, rename your current MQTT broker ca.key to something else.
Copying to the target machine using Linux SCP can be done like below. Of course depending of your Home Asisstant authentication method you might have to type in your username and password as well. I’m using public-private key pairs to connect so it’s automatically authenticating for me.
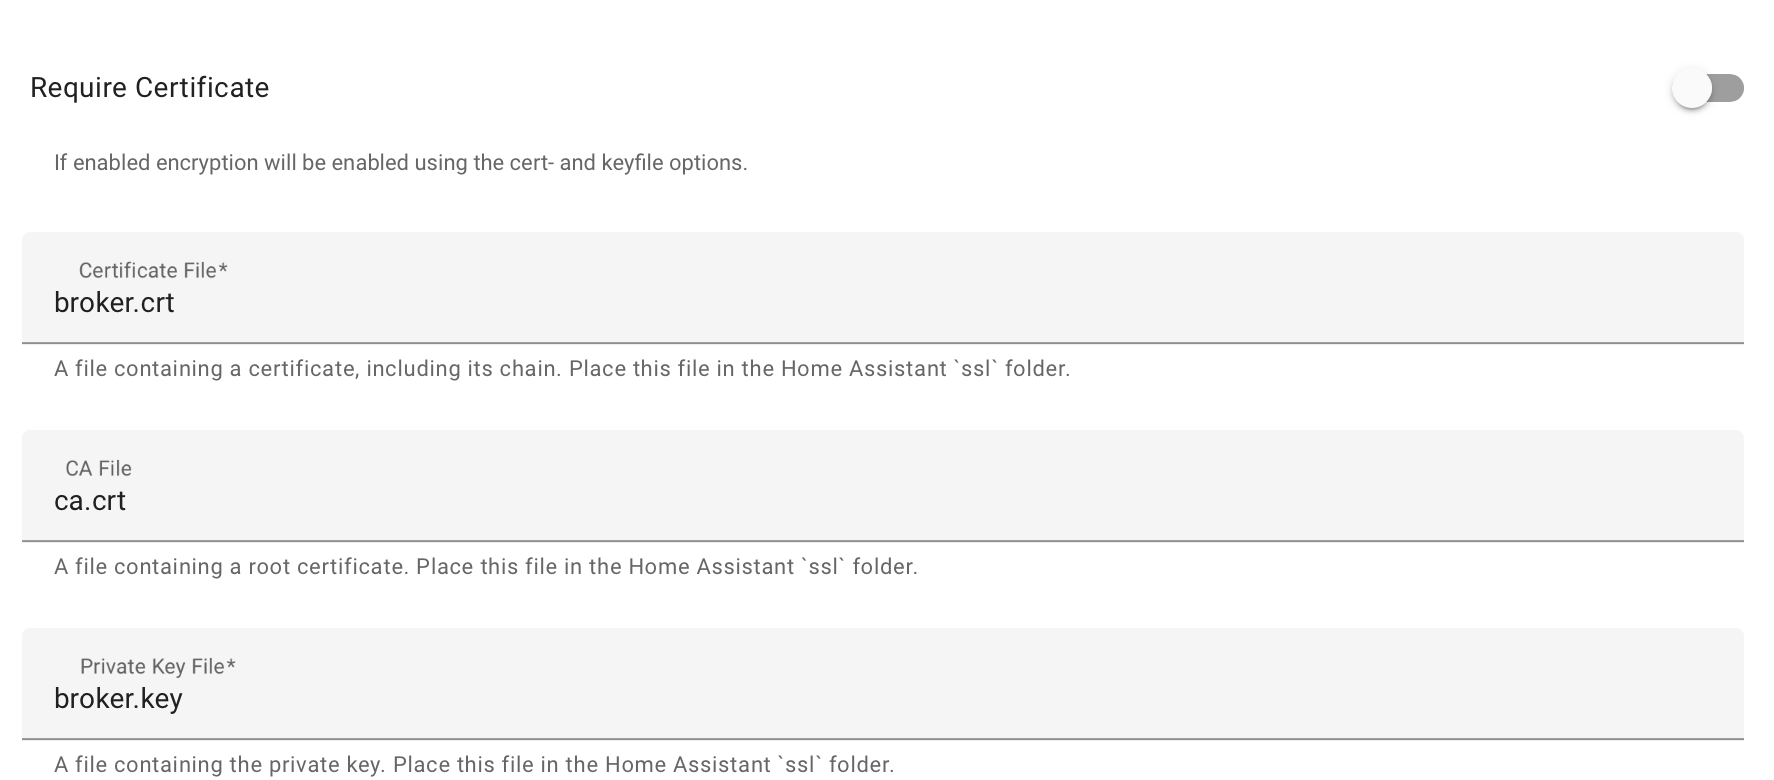
scp {broker/broker.crt,broker/broker.key,ca/ca.crt} root@homeassistant:~/sslNow we have the SSL in place so we just need to enable our MQTT broker with the SSL encryption. I’m using MQTT Add-On for Home Assistant, so just going to Settings -> Add-ons -> Mosquitto Broker -> Configuration we’ll find the proper settings to enable the SSL.
Type in the SSL cert files and setup the SSL port to 8883, restart the addon and you’re all set! The SSL certs should be now in use and port 8883 is used when connecting with encryption enabled!
Pairing with Local MQTT broker
Depending on your setup and device, this can either be very easy or very difficult. First I recommend to try using the Meross Custom Paired App for Android created by @albertogeniola.
If you can pair the Meross device with the app, good. If not, continue reading. I think I had all the problems when trying to connect with my local mqtt broker..
For this part you need a preferably laptop computer with Unix based system like Linux or Mac and a piece of software create by @ByteSpider.
The software is written by using npm 12 so that needs to be installed first. Internet is full of guides how to do that. E.g. this.
After you hae npm 12 successfully working, you can clone the Meross configurator repository with git clone https://github.com/bytespider/Meross.git
Now set the Meross device into pairing mode by pressing the button for 5 seconds (might be different on other models/devices than the MSG100 garage door opener).
Now let’s connect our laptop WiFi with the Meross devices by selecting the Meross WiFi network from computers network settings. After this part you won’t be able to connect to the internet until WiFi is changed back to normal, so please keep this page open 🙂
Now through the linux/Mac terminal enter to the cloned Meross/bin folder and type
./meross-info --verbose --include-wifiThis should list the necessary information of your Meross device along with possible WiFi connections. Copy the credentials info and preferred WiFi network
While we are still connected to the Meross, let’s configure it to use the proper MQTT broker even though we haven’t set the user yet. Depending on your WiFi network, you might need to pass the cipher, encryption and channel. At least on my multi AP Unifi system I had to configure the network installation in very detailed level.
./meross-setup --gateway 10.10.10.1 --wifi-ssid YourNetworkSSID --wifi-pass YourNetworkPassword --mqtt mqtts://192.168.1.100:8883 --wifi-cipher 6 --wifi-encryption 7 --wifi-channel 1 --verboseAfter setting the configuration Meross device should now reboot, but it won’t connect properly since we are missing a proper user from our MQTT broker.
Now switch back to your local WiFi (or wired) network and continue to Home Assistant,
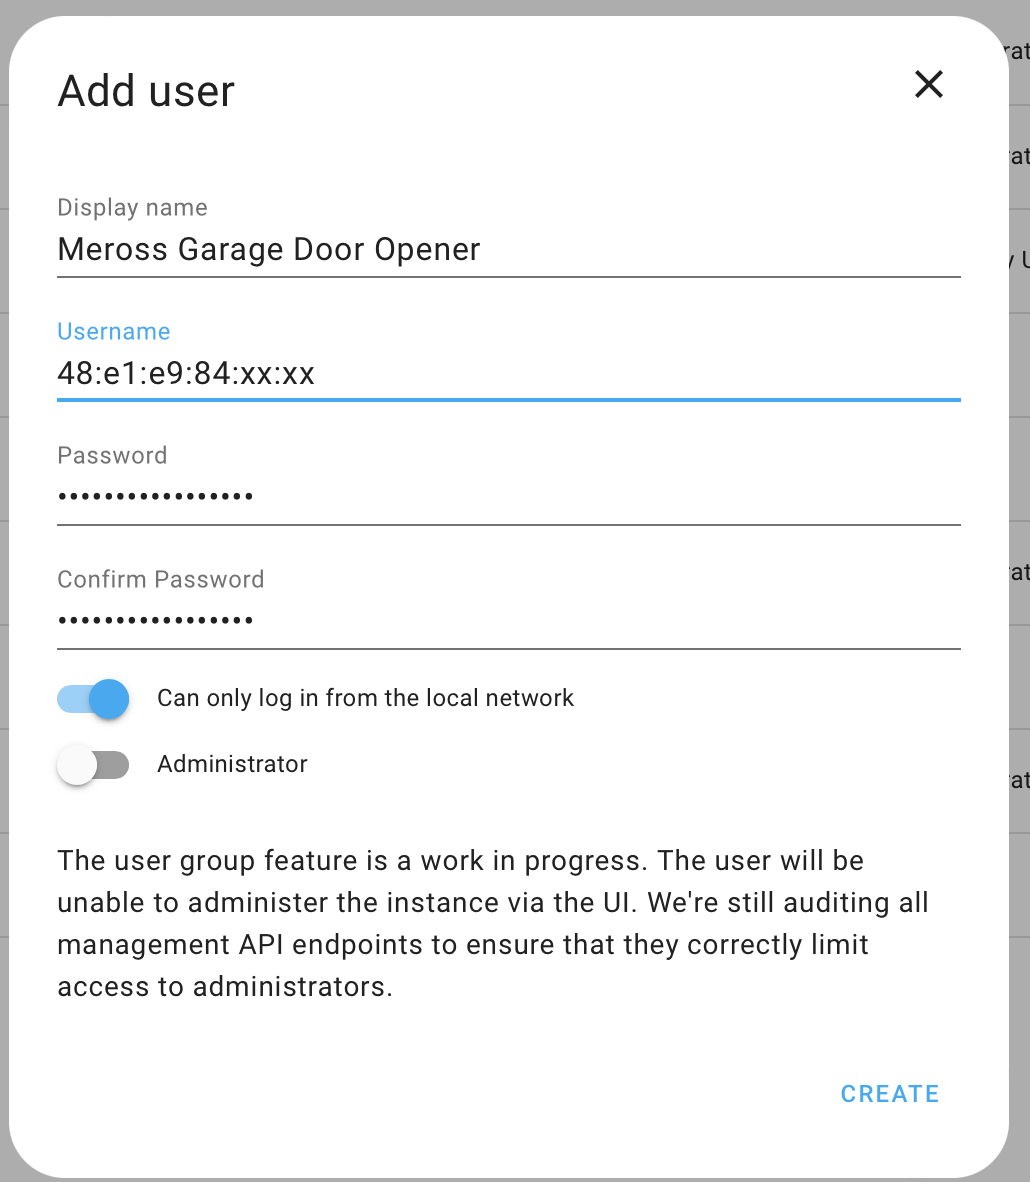
When using the official Home Assistant MQTT Add-on we can define custom user + password directly from the add-on configuration menu, but unfortunately it’s not supporting special characters in the username part and Meross MQTT user is hardcoded as the device mac-address.
To overcome that, we have to create a new Home Assistant user with the username as mac address. So enter Settings -> People -> Users and create a new user named anything you like and add username as the Meross device mac address copied earlier. Password should be also the same as copied above. And turn on the switch that allows only local connections, we don’t want anyone outside to access with that user.
Now everything should be ready for the Meross device to connect. Restart the Meross device by disconnecting it from the power supply and connecting again. It now should blink only green led (at least on Meross MSG100 Garage door opener).
Integration to Home Assistant
Now the final part, Home Assistant integration. There’s a custom component called Meross LAN created by @krahabb. Luckily the Meross LAN can be install through HACS.
Once installed and Home Assistant is restarted it should auto discover the device added. Just put ‘user set’ as key and paste the key from the copied values in the previous chapter.
If everything went as supposed, you should now have Meross device in your Home Assistant through only the local MQTT broker and everything is working instantly! No need to use the cloud broker anymore and we can also dumb the local HTTP polling.
Conculsion
Even though I’m running Meross fully local now with my Garage door opener, I’m still not 100% happy with it. The biggest problem is that I don’t have clear status when the door is open. I only get the information when door is starting to open and from that point the timer is being run (insde Meross) for 30s and the door is marked open at that point!
However, it’s now better than before and will work until I manage to build my own ESPHome Garage door opener with two reed switch 🙂
This is an awesome post and exactly what I’ve been looking for !
I’ve got some Meross mss210 and mss310 plugs that I’m trying to use with HA. I’ve followed your instructions as best I can (the android app wouldn’t work for me but the scripts worked great).
However, when trying to get an mss210 configured I seem to be falling at the final hurdle in that the plug keeps on connecting to Mosquitto and then disconnecting.
The Mosquitto logs show many lines like the following:
2022-09-25 22:29:58: New connection from 192.168.1.220:52981 on port 8883.
2022-09-25 22:29:58: New client connected from 192.168.1.220:52981 as fmware:1903262489242525183834298f1dbe8a_noTNsAgaagKqlpgY (p1, c1, k120, u’XX:XX:XX:XX:XX:XX’).
2022-09-25 22:30:16: Client fmware:1903262489242525183834298f1dbe8a_noTNsAgaagKqlpgY disconnected.
I’ve obviously got the wifi and HA user set up correctly as it’s connecting to Mosquitto, but I can’t understand why it keeps disconnecting.
Here’s my mosquitto configuration:
logins: []
require_certificate: false
certfile: broker.crt
keyfile: broker.key
customize:
active: false
folder: mosquitto
debug: true
anonymous: false
tls_insecure: true
tls_version: tlsv1.2
cafile: ca.crt
Any help would be fantastic !
Thanks again,
Archie
Is your mss210 HomeKit compatible?
I think I had the similar issues with the HomeKit compatible devices and those couldn’t be connected to local MQTT at all.
Thank you so much for this article. It was a happy end after endless Github threads, downgrading Mosquitto, and fiddling with the custom meross pair app. No hacks, just config.
I had to fire the “meross-setup” command again after creating the user in HA. Otherwise, the smart plug would return to pairing mode after a power cycle.
Since then it works perfectly with my Meross MS310.
Great to hear the article was helpful and thanks for your comment about the re-running the meross-setup.
I don’t recall of doing it myself, but there were quite many trial and errors until got it working myself either so your comment might be very helpful for other readers!
Hi there,
I think I finally got this working.
mosquitto addon is installed.
I had to use the npm tool to add the meross plug and here are mosquitto logs :
time=”2022-12-31T11:54:19+01:00″ level=debug msg=”checking auth cache for 48:e1:e9:60:b9:63″
time=”2022-12-31T11:54:19+01:00″ level=debug msg=”to auth record: [97 117 116 104 45 52 56 58 101 49 58 101 57 58 54 48 58 98 57 58 54 51 45 48 95 48 49 56 50 55 57 50 53 56 51 101 98 100 48 102 100 100 52 57 97 102 98 98 99 49 49 56 49 57 54 99 102 218 57 163 238 94 107 75 13 50 85 191 239 149 96 24 144 175 216 7 9]\n”
time=”2022-12-31T11:54:19+01:00″ level=debug msg=”checking user 48:e1:e9:60:b9:63 with backend Files”
time=”2022-12-31T11:54:19+01:00″ level=debug msg=”checking user 48:e1:e9:60:b9:63 with backend HTTP”
time=”2022-12-31T11:54:19+01:00″ level=debug msg=”http request approved for 48:e1:e9:60:b9:63″
time=”2022-12-31T11:54:19+01:00″ level=debug msg=”user 48:e1:e9:60:b9:63 authenticated with backend HTTP”
time=”2022-12-31T11:54:19+01:00″ level=debug msg=”setting auth cache for 48:e1:e9:60:b9:63″
I can see my mac address listed here, so something is happening.
I am then going to Meross lan, and there I have no clue what to do.
I use cloud to retrieve the device ID, but even then, nothing happens.
Any clue ?
Have you tried using the ‘user set’ mode?
Hi Toni – thank you very much for this. I successfully used the pairing app and verified that the mss510 switch is sending messages to the local broker (I’m watching messages after connecting to the broker). HA also shows a new device notification. I too am a bit stuck at the last step. It’s not clear to me what to put in for the key to add it to HA. I tried a few values for the device key with key selection mode set to key but generally get an error from the integration saying Should I be using my own key in the pairing app ? Since I am in the process of moving from cloud to local, can I have a mix of devices using the Meross LAN integration ?
Hi!
Unfortunately I don’t know how to get the key from the pairing app, since I did not work for me and I had to go through with ‘longer’ process of using shell commands 🙂
Yes, you can use both local and cloud devices. But of course if you move one device from the cloud to local MQTT, that specific one can’t be used from the cloud at the same time.
For example, I’m using my Meross garage door opener through local mqtt and my Meross smart plug at summer home is using the cloud only. Both works fine from the same Home Assistant instance.
just wanted to say thank you, this got me 95% of the way there. also wanted provide some updates for those digging in the first time that tripped me up
@Archie, thats where i thought i was stuck, turns out, thats how it works. i adjusted the mqtt logs to ‘debug’ level and noticed it was publishing topics when it connected. so it was working all along, and i spent forever looking for what was wrong! all i had to do was sub to the topics and i was in business. it connects, pushes stuff, disconnects, over and over again
@Toni, few things
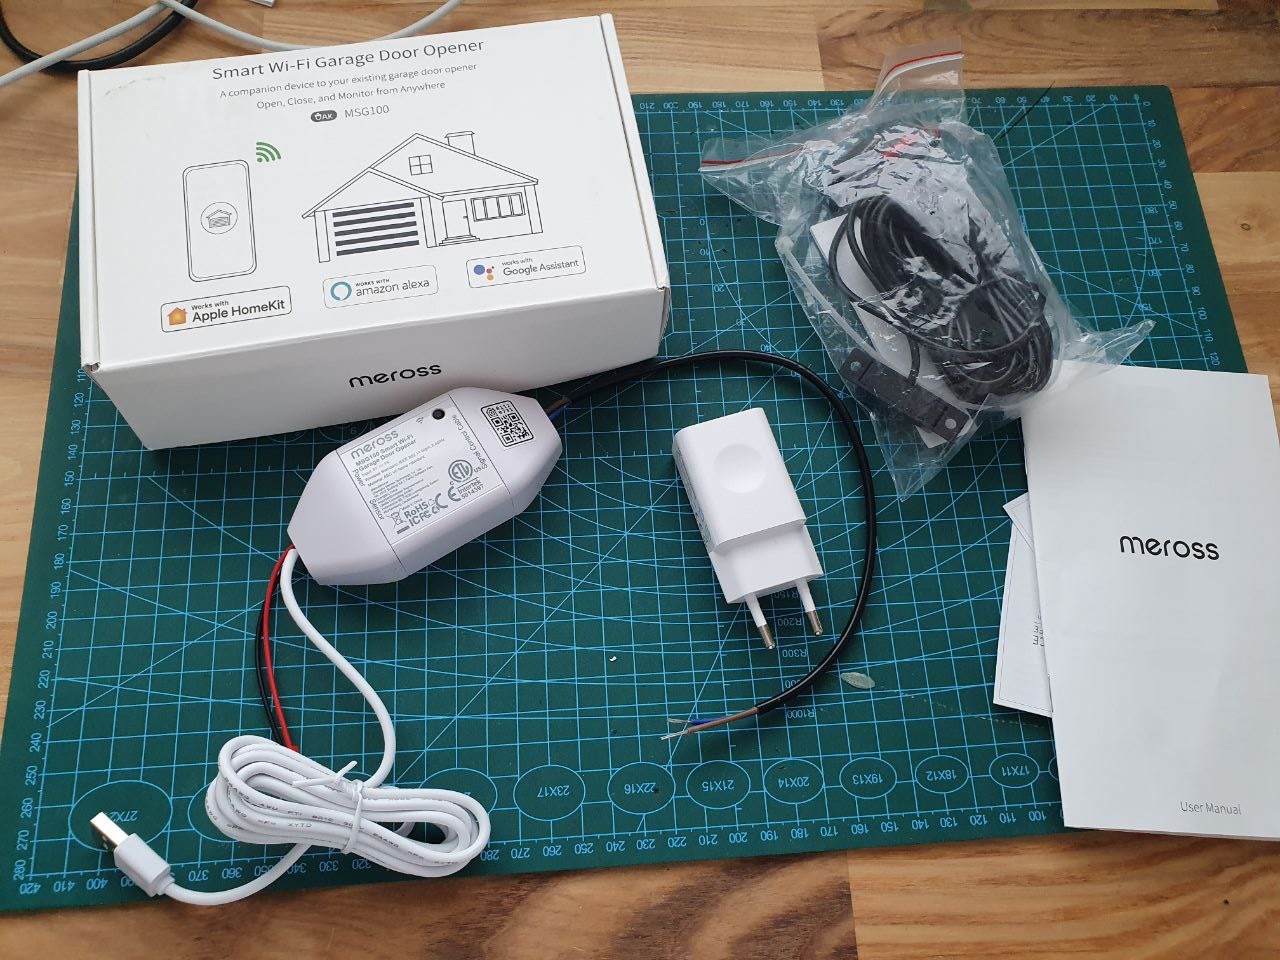
1) just an oddity, you state that you need to use the NON-homekit version, however your main pic shows the box of the homekit version, a little confusing 🙂
2) curious, what would push you now to another device/setup at this point. what feature are you missing. i found another blog using a shelly 1 and reed sensors, however after reviewing, he is doing the same thing and is able to get the same info. i see no difference. i guess one main advantage could be never having to worry about the shelly 1s ‘phoning home’, but curious what else you feel is missing. the non-homekit meross come in at $22 (as of writing this), so 45 for both doors. 2 shellys are 38, reeds are 8-12ish, wire, and potentially some 12v plugs, and it moves up (maybe 60ish depending on how well you do on the off items). not a ton, but there is good value in the meross kit if nothing else. anyway, curious to hear more of your thoughts, and if it’s just the 30s delay? wouldnt one attribute the ‘opening’ status as ‘open’ in addition to the ‘open’ state once that 30s delay is hit? also, if you move the sensor in front, it auto goes to ‘closed’ so it is accurate even if outside forces close the door and not the HA
3) i too could not get the pairer app to connect to my mqtt broker, however, if you use the ‘manual’ option in the main menu, and just put in ‘0’ in as the ID and nothing else, you can finally click the ‘pair’ button from the hamburger menu and continue on entering the details on connecting it to your wifi and mqtt. might be helpful if you want to include in your article for those who got stuck with the app or have limited devices to do the scripts. saw it on github somewhere and it worked
4) as a disclaimer that may also want to get called out, HAs most recent mqtt addon may or may not be based on mqtt 6? worth maybe putting a note to check that, you’ll need mqtt 5 for it to work (or so i’ve seen in github issues). there are ways to get eclipse-mosquitto (which is 5 compatible) as the addon, or just stand one up in a docker container through portainer addon (or standalone if using non-supervised installs like me) then add the mqtt integration
anyway, super awesome writeup, shame i have to come here to get instructions vs the actual people who write the super awesome utilities
Hi!
1) Nice catch, I did use the same cover image as in my previous Meross garage door opener article. Since writing the first article I switched to non-home kit version 🙂
2) For the future DIY (garage door light status) I need to know exact status at the exact time of the door, so basically I need two reed switches. Also planning to implement a sonar sensor to check if car is at the garage 🙂
..and third my Meross device broke down a month ago on an electrical failure so I’m using plain old remote control until I decide what new device to get.
3) Thanks for pointing this out!
4) Need to check this version conflict out. Unfortutately can’t really play with my Meross garage door opener anymore (see point 2) 😀
And last but not least, thank for your great feedback! Really appreciate it!
1) yeah no worries, just caught it randomly
2) cool! yeah, just didnt want to invest heavily in this meross device if there were others that made more sense. honestly, i may just even swap over to a shelly anyway to eliminate any fear of the meross phoning home. and yeah, obviously you’d need a couple other sensor slots for determining open and closed in a more precise manner. sounds like a cool project
3) np, lost an hour fighting with the pairing app until i found that tip. may help others
4) yeah, no worries, just something i’m seeing posted in the github issues on these, noted here, but a few other places as well: https://github.com/krahabb/meross_lan/discussions/63#discussioncomment-1243203
Curious about the HA addons/integrations. There are 3 out there, which ones are needed?
Meross Integration (Alberto Geniola)
Meross Lan (krahabb)
Meross Local Addon for Homeassistant (Alberto Geniola)
Also, in the broker.crt, you issued a 1yr cert, any reason why you didn’t go with a 3 or 5 year instead? (was the 1yr for testing?)
Hi!
The one I’m using is “Meross Lan (krahabb)”.
And for the cert, you should able to go longer. I just happened to go with 12 months
There needs to be more explanation on how SSL is enabled….
I still have the following in my MQTT logs on start up:
INFO: SSL is not enabled