
A dive into SwitchBot ecosystem
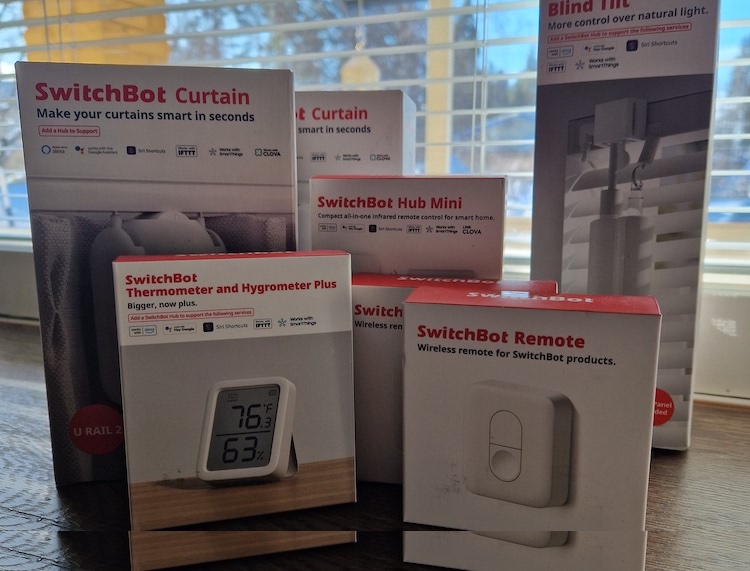
You must have heard about SwitchBot? The small and simple finger bot to press a physical button of any kind. However, that’s not all with the SwitchBot! Along with the finger pot, the SwitchBot has many other neat Smart Home gadgets in their product line up. In this post I will take a dive into setting up some SwitchBot devices and integrating them into my Home Assistant installation.
Disclaimer: I was contacted by SwitchBot representante few weeks ago and we agreed that I will try out their devices and write an article about it. So even though the products to be tested are sent as a gift, all the reviews and discoveries in this article are all 100% honest as always!
Note: While testing the devices and writing the article I noticed that I’m only touching the tip of the ice berg here. There’s a tons of possibilities how to use SwitchBot devices and how to integrate them into other Smart Home ecosystems. While writing this article I realised I need to write up few more articles to cover all I want to say, so this article is just a start of it all..
Technical details
Currently SwitchBot is using Bluetooth Low Energy (BLE) as wireless communication technology. BLE works with 2.4GHz (same as WiFi and ZigBee) so it won’t pass through stone walls very well, but fortunately BLE supports Mesh Networking so signal range can easily be increased by setting up more BLE devices.
BLE is commonly used in many IoT devices, since it’s very low powered and with it you don’t have to sacrifice battery life for features. However, I’d like to know the reasons for SwitchBot to pick up the BLE instead of commonly used (mostly Smart Home items) ZigBee?
SwitchBot devices can be used as standalone using BLE and/or by connecting through the SwitchBot HUB.
SwitchBot has it’s own app to do all configurations and data displaying, so there’s no need for another Home Automation system if the user just wants to use the SwitchBot devices.
The HUB
SwitchBot HUB is a BLE to WiFi gateway that connects all the SwitchBot devices to the network (+cloud) and makes all SwitchBot devices controllable from outside the home as well. It also works as a data storage so all the data from the sensors and devices are being collected automatically 24/7 without need of any interactions. And that’s not all, it enables automations, voice control and interactions between multiple devices. Just to remember that Hub works with the SwitchBot devices only and can’t be used with other manufacturer devices (obviously).
What’s in the box
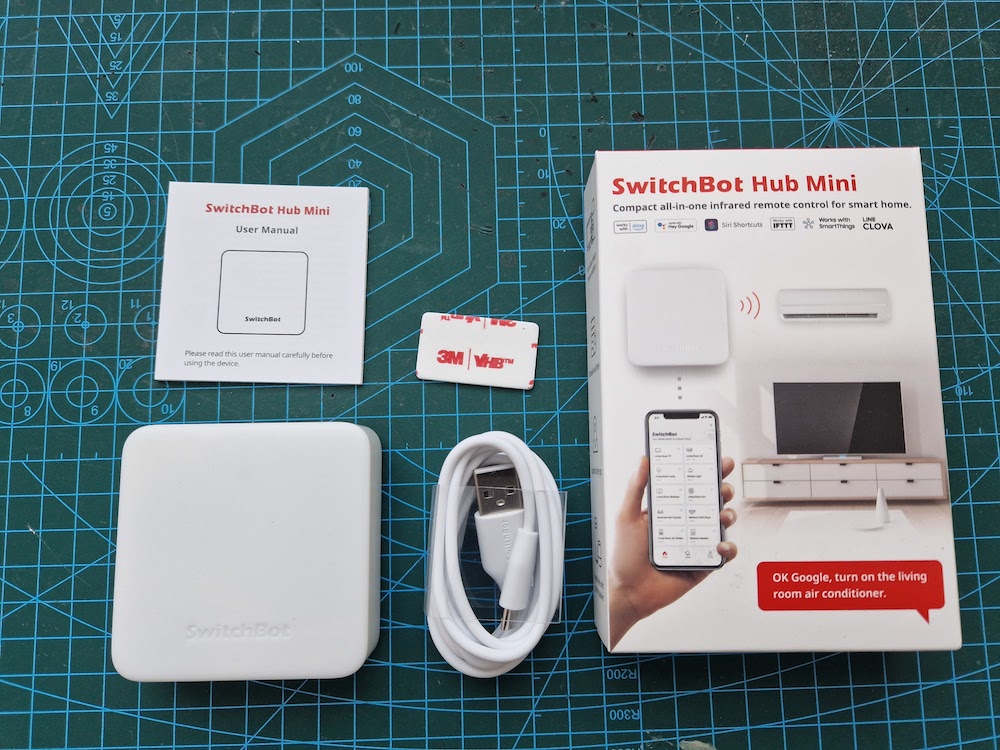
SwitchBot Hub Mini itself is physically very small, only 6.5cm x 6.5cm x 2.5cm. The package contents includes usb-a to micro-usb charging cable, wall sticker and a quick start manual. It does not contain power supply itself. But since the input power required is 5V/1A, almost any USB charger will do just fine. Who does not have old cellphone chargers lying around in the closets?
HUB Mini – Features
The HUB does not actually have ‘much’ stand alone features, but extends other SwitchBot devices to be used more widely. It basically collects realtime data, automate and connects other SwitchBot devices together. You could for example set the blind controller to turn of blinds when SwitchBot buttons is being pressed.. or how about automatically closing the curtains when sun sets? or closing the blinds when temperature sensor detects too high indoor temperature?
However, along with the centralised HUB, there’s one great feature integrated: The HUB works also as a IR-blaster so you can control your old fashioned IR-devices (like AC units, Home Theatre systems and TVs) using the same HUB as long as there’s a line of between devices.
HUB Mini – Setting up
Everything starts with installing the SwitchBot app either from Google Play Store or in case of iOS, from Apple Store. Once the app is ready it’s time to launch it and make a personalised SwitchBot account using it. The app itself guides everything through very well so I won’t be going through the process step by step. I’ve rarely seen this good walkthrough for setting things up, well done SwitchBot!
HUB Mini – verdict
Small, simple and does what it needs to do. Only thing I’m quite not happy with is micro-usb port and cable. Now days all the manufacturers are moving to new usb-c that’s becoming a standard in the cell phone industry as well. Why is SwitchBot not into that?
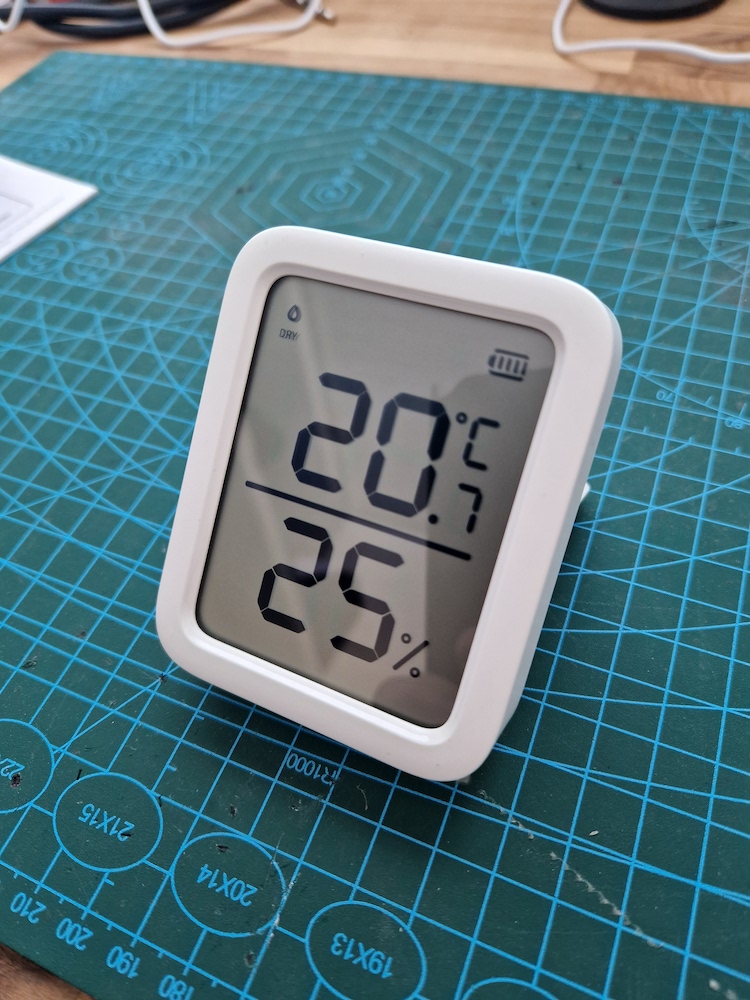
Thermometer and Hygrometer plus
For the first item I’m going to be adding a Thermometer plus into my newly configured HUB Mini.
Thermometer Plus – What’s in the box
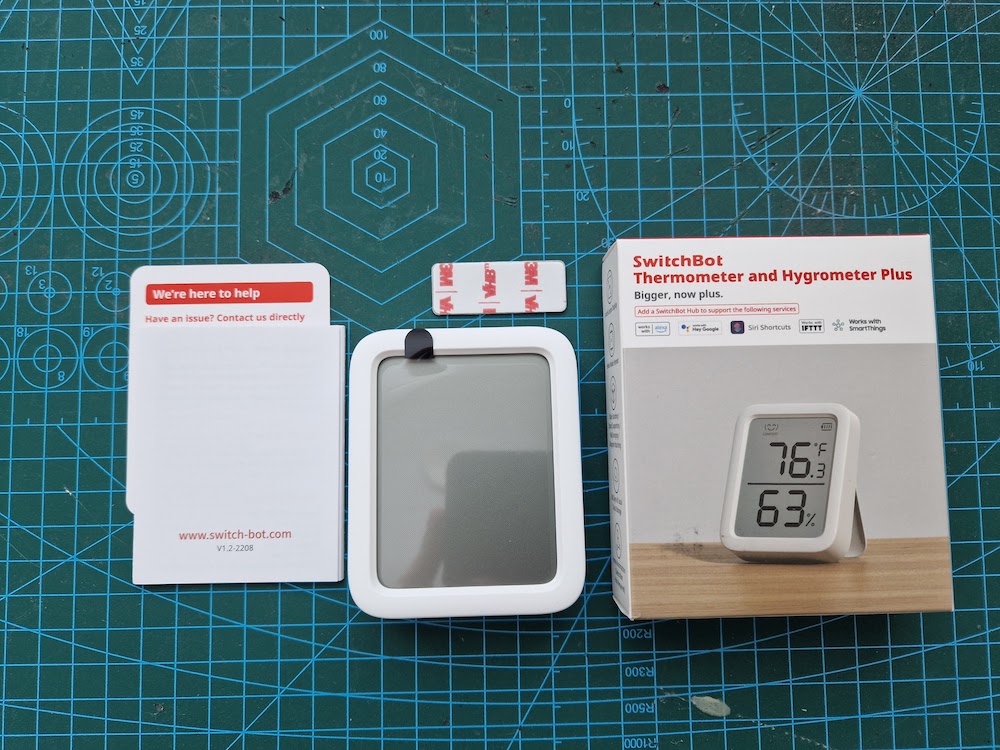
Thermometer plus package comes with the device, a quick start quide and a sheet of metal with tape in another side of it. The device has a strong magnet inside so it can be magnetised on the wall using this piece of metal.
The device has also two AAA batteries preinstalled that just needs to be activated by removing a piece of plastic through the back cover.
Thermometer Plus – Features
- Temperature meter (Range -20°C – 80°C, Resolution 0.1°C)
- Humidity meter (Resolution 0.1% RH)
- Sharp black and white TFT Display
- Powered by 2x AAA batteries that should last one year
- Bluetooth LE
- Magnetic backplate to stick the Meter Plus in the wall
Thermometer plus – Setting up
Setting up the thermometer and conneting to the hub starts by launching the SwitchBot app. Once launched, add new device from the plus-sign and continue the pairing process through. This time there’s no need to add any WiFi information since it’s already been done when setting up the HUB.
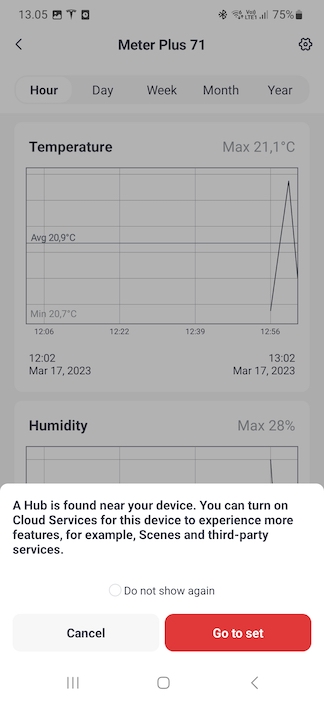
Again, very easy procedure and well thought. No extra steps anywhere and the app guides you through very clearly. When paired, everything is instantly usable (except cloud that needs to be enabled separately).
In order to enable cloud services for this specific device, user needs to go view the device details and enable from device specific settings. Once enabled user can also use setup voice assistants and/or IFTTT.
Thermometer plus – Verdict
Simple thermometer with humidity readings. If you want to collect room temperature data or view it in realtime from the wall, a good product for that. Nothing too fancy on it though.
Easy pairing, nice looking. One thing I miss is the eInk display. Using the eInk the display would be even more sharp (not that’s it bad now though) and batteries would be last even longer.
How long does the batteries last will be seen, for now, I need to trust the specifications (one year).
Integrating into Home Assistant
How about SwitchBot and Home Assistant? There’s multiple ways SwitchBot devices can be connected to Home Assistant: Using official Home Assistant SwitchBot integration, ESPHome as BLE gateway or even the official SwitchBot API. User just needs to select what’s best for him/her.
Using official Home Assistant SwitchBot integration
Home Assistant Official SwitchBot integration connects directly from the Home Assistant server to the device and does not need to have a SwitchBot HUB installed. However, this requires user to have Bluetooth hardware installed and configured in his/her Home Assistant server. My own Home Assistant PC is running far off from the devices in a separate device rack, so I’m not using this approach and won’t be going through this method in detail. Readers can checkout of this method out more from the Home Assistant SwitchBot integration page.
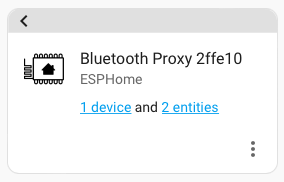
Using ESPHome as BLE Proxy (my way to go)
ESPHome is a IoT platform that can be run in a ESP32 (or ESP8266). In this integration method we are forced of using much more recent ESP32 that has BLE chip already built inside. This is more of a advanced approach, but in my opinion, it’s the most convenient way to integrate ‘any’ BLE device into Home Assistant.
It’s possibly to build vast amount of ESP32 devices and scatter them around the house in order to cover the whole house BLE devices! It does not only support SwitchBot, but many other BLE devices as well.
When using this method, user don’t have to rely on cloud connection and everything is locally handled in the house (like in the official integration) and this method does not force a use of HUB either. It can still be used in parallel though if wanted.
This method actually uses the same integration at the end as the official Home Assistant SwitchBot integration, but is just routed through WiFi to the Home Assistant instance. So for supported devices, above page can be checked.
Guide how to construct and configure a ESP32 BLE gateway can be found on a separate article.
SwitchBot API
Last, there’s an Official SwitchBot API. This method is a cloud polling so you will be relying on a internet connection and this does require a use of a SwitchBot HUB.
Unfortunately there are not currently a ready made Home Assistant integration for this API at the time of writing, but it’s possible to use the API through a REST templates with Home Assistant templated sensors!
Using the API through templated sensors is quite complex and is at the moment only for API 1.0 (while the latest version of SwitchBot API is 1.1). I would not recommend of using this approach, if you are able to use either of the above BLE methods.
For more information about this approact there’s a long thread active at Home Assistant community forums.
I’m very confident that an official/unofficial API integration will pop up for Home Assistant sooner or later, since the API is very well documented and there’s even a Python examples created by SwitchBot. Heck, I might even write one by myself when bored..
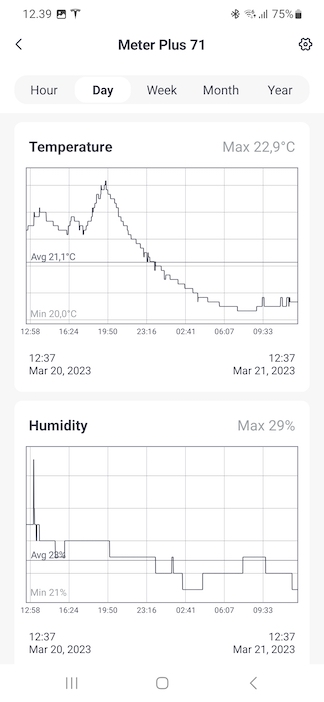
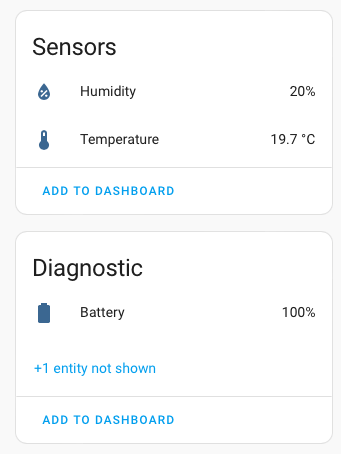
How does everything work together with the Home Assistant?
With the ESP32 Bluetooth Proxy in place, the Meter Plus has worked great together with the Home Assistant for few days now. I have not had a single signal drop off and Home Assistant is receiving realtime updates immediately when the environment values changes. Hopefully rest of the devices will be as reliable as this one. More with those later when testing out other SwitchBot products!
Conclusion
So far I’ve only played with the HUB Mini and Meter Plus. I’ve used the SwitchBot app with the HUB and integrated a devices into my Home Assistant. If you just want to use only SwitchBot devices then the HUB is great deal and way to go, but if integrating into existing Smart Home environment (like Home Assistant) the HUB is quite obsolete and there’s currently not much of use for it. However, in the future, if Home Assistant API integration is implemented, things might be different? I would love to see HUB IR blaster controlled through the Home Assistant as well.
How do I like the SwitchBot ecosystem? Here’s my list of pros and cons:
Pros
- Very impressive looking product lineup
- HUB is great if you want to stay only in the SwitchBot ecosystem
Cons
- BLE. Why not to use some more generally used like ZigBee?
- Home Assistant integration might need some advanced setup and is not just ‘plug and play’ unless using something like Raspberry Pi that already has a Bluetooth chip built in
As noted in the beginning of the article, I’ve just scratched the tip of the ice berg with the SwitchBot devices. I still have not tested their coolest devices like curtain bot or blind tilt controller. For those I will be writing a separate review and setup journal (actually curtain bot review will be a guest article by a friend of mine). Along with that a guide how to setup Bluetooth to Home Assistant Proxy using ESP32 will be available in very near future is available on a separate post.
Promotional message:
Need a SwitchBot device? You can get 10% off with the creatingsmarthome.com code 10UPF4RLGELVDV directly from the SwitchBot store.